Easter Egg Crafts

Easter Crafts With Eggs
Easter eggs are a long-standing Easter tradition. Folklore has it that the egg is a symbol of new life, so it is fitting for a celebration in the springtime as plants and animals begin to reemerge. Of course, it is an easy tradition to keep going, because Easter eggs are just so fun to make! But, if you can't stand blowing out eggs, or if you or others have egg allergies, keep reading: there are also fake-egg crafts that make beautiful Easter "eggs" without the mess of blowing them out. You can make unique Easter egg crafts with the craft tutorials provided, or buy Easter egg kits to save time and still get great results!
For 2013, Easter falls on March 31st. With these cool ways to dye Easter eggs, you will be able to keep children (and yourself!) entertained all day. For more elaborate celebrations, make sure you have enough materials, and start early to have enough eggs for a wonderful Easter egg hunt with handmade baskets.
Getting Started with Easter Eggs - Blow Out to Prepare Eggs for Decorating
If you're using real eggs for your Easter Eggs, you need to prepare them by blowing them out, so that they are clean on the inside. The basic way to do this requires:
- Eggs (Of course!)
- A nail or small knitting needle
- A toothpick
- A small stirring straw
- A bowl to catch the goop

Let's begin!
Start by taking your easter egg to-be and washing it thoroughly. After it is clean and dry, use the nail or other tool to poke a hole in the top of the egg (where it is narrow), and hole in the bottom (where the egg is thickest and the air pocket resides). Make the bottom hole a little bit bigger: this is where that goop will be coming out! Now, stick your toothpick in the large hole and break the membrane of the yolk. Be careful not to enlarge the hole too much while you're doing this.
Now that the egg is prepared for blowing, take your stirring straw and line it up with the top hole. Blow through with even pressure. The yolk and white should begin to come out. If you can fit the straw inside the egg without cracking the shell, that's fine too. Keep blowing through the straw until you feel the egg is reasonably empty.
You're not done quite yet however! Take the egg and rinse under a gentle stream of water. Try to get plenty of water inside the egg, and the blow the water out until it comes out relatively clean. After you have done this, you can set the egg aside to dry. Overnight will probably work best, or in the oven on a low temperature.
Depending on how many eggs you want to make, this may seem like a great deal of work, but the authenticity is second to none. Plus, you will be able to store your decorated eggs for a long time without the worry of bacteria or stinky egg smell!
Notes: Older eggs may work better, as the white will be more liquified. The stirring straw is technically optional, but it makes the process a lot less icky and more sanitary.
Making Basic Easter Egg Dye
For Colorful Easter Eggs
You can make your own dye, or buy it from the store. For more information on making your own dye, here are some great websites:
Basic Easter Egg
Dye Recipe
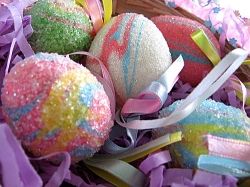
This is a fantastic, no-hassle recipe for basic Easter egg dyes. It also has a quick instruction on glitter eggs! Follow this recipe, and you'll have no problem at all making fun, bright colors for your Easter egg decorations.
Natural Easter
Egg Dyes
Using the color table and instructions, this article on natural Easter egg dyes will teach you how to make Easter egg dyes from natural ingredients like fruits, teas, vegetable, spices, and more! Kids will love making their own one-of-a-kind shades from a wide variety of options. I love this one because each color will be totally unique!
Egg Dyeing
Walk-through
This step-by-step egg-dyeing walk-through has a dye recipe and also some cool tips on tie-dyed Easter eggs. It's very simple to follow, and you'll be making beautiful eggs in no time.
Easter Egg Dyeing Video
Watch the whole process of basic Easter egg dyeing using McCormick's food coloring as the dye base. Once you're familiar with dyeing Easter eggs, more advanced techniques will be even easier for you.
Easter Egg Kits and Dyes - For the Busy Bunny
Pressed for time? These products will make decorating Easter eggs faster and easier.


Simple Masking
Dye Technique No doubt you have the hang of simply dipping an egg by now, but there are so many fun things you can do besides make solid-coloured eggs. An incredible variety of materials can be used to mask off sections of eggs to reveal beautiful patterns once the eggs are dyed. Follow the link to learn how to make plaid eggs, striped eggs, and pretty flower and leaf patterns!
Wax-Resist
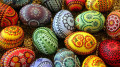
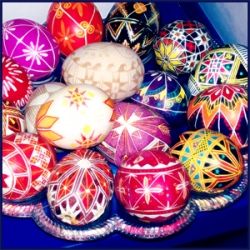
Pysanky EggsThese beautiful Easter eggs are dyed using a wax-resist method called batik that shields portions of the egg from the dye. Batik Easter eggs often use a stylus called a kistka, which funnels melted wax held in a tiny cup onto the egg like a pen. These Easter eggs are known by many names: Hungarian, Ukrainian, and Pysanky Easter Eggs are the most common. For myself, well, I just call them beautiful! I would melt the wax off the egg on low heat in the oven rather than over a candle, personally.
Dye-marbled
Easter EggsA bit more elegant than the tie-dye effect, and a very convincing look. Hm, maybe try it with natural marble colors and see if anyone is fooled, eh? Oil is actually used in a cup of Easter Egg dye in order to prevent some of it from sticking to the egg. Learn more by following the link!
Tissue-Paper
Dyed Eggs This is a fun and easy way to color Easter eggs, and the effect is completely wonderful. It looks a lot like stained glass, actually! Here's the deal: No color-cups, no dipping, no splashing. How? Using colored tissue paper! More details in the link, but basically you layer wet tissue paper on plain eggs and then peel them off when they've dried. Viola, pretty egg! The website has more tips, so take a peek. Worth a look!
Clay Satin
Swirl Egg An amazing polymer clay Easter egg craft. After a little sanding and some sealer, these swirling-patterned Easter eggs are so stunning. If you don't have a pasta machine, you can probably use wax paper or plastic wrap and a rolling pin (don't get any clay on the rolling pin is itself, as polymer clay is not food-safe).
Crayon Wax
Marbled Egg A similar effect as above, but a few different materials. Very interesting effect! I would never have dreamt of decorating eggs with melted crayon wax, but it is so cool. The egg ends up with a swirly marbled effect. Crayons and candles are a lot more accessible than polymer clay and pasta machines, so if you are worried about having the materials onhand, this could be the way to go for beautiful and unique Easter eggs. The color choices are practically endless with all the crayon colors they make these days!
Mod Podge
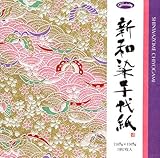
Elegant Eggs These gorgeous Easter Eggs use origami paper to brighten them up and give them a very modern appeal. I love the look, and it seems so easy to create beautiful Easter decorations with just a few simple steps and some drying time! Considering all the beautiful designs of origami paper, the possibilities for these are limitless.
More Easter Egg Craft Supplies
Make sure you have enough on hand! Polymer clay for beautiful and unique clay Easter eggs; Mod Podge and origami paper for decoupaged designs; a kistka and beeswax for traditional pysanky decorations.


Your Favored Techniques?
It's obvious that there are numerous ways to decorate an egg, but everyone has their own preferences. For myself, I like both! There are so many interesting finishes and techniques, I don't think I could choose one or the other. Could you? There are no wrong answers for such a question, remember!
What do you prefer for Easter eggs?
Papier Mache
Easter EggsI love the idea of treats inside an Easter egg. These are very clever little papier mache eggs with fun pull-strings to help open them. What's inside? That's up to you! Make nametags and have unique eggs for each person, or use them to distribute prizes for an egg hunt: fill each with a strip of paper they can use to redeem for candy or other things.
Fabric
Easter EggsAwesome Easter egg softies. Great for the little ones to play with, and so many options for customization. In addition to patterned fabric, embroidering light pastel fabric with pretty designs and then sewing them together would be a fun and cute craft. They'd look like Easter eggs, but they'd be totally squishy and uncrackable!
Paper Punch
Easter EggsThese foam-core eggs look great with circle-punched paper, but I bet a lot of other fun paper-punch designs would be terrific as well, and it would really help customize the look. Circles for elegant Easter decorations, squares for a more modern look? Fancy corner punches, flower punches... I think I need to pick up some of those foam eggs myself! I would prefer hotglue rather than pins, and cover the foam egg in a stretchy, patterned fabric first and glue it down, just in case there are any gaps between the punched shapes.
Spring Flower
Easter EggsUsing foam core eggs again (you didn't use them all on the paper-punch eggs, I hope!), you can create cheerful Easter Eggs with a few pins, some false flowers, and a little time! They look absolutely stunning, whether hanging or in a basket decoration. You might find it hard to put them away after Easter is over. For year-round decorations, use round foam instead of egg shapes (promise I won't tell!).
Easter Egg
Coloring Pages
Craft Materials for Faux Eggs
Check your supplies: faux eggs use different techniques and materials than many real Easter Eggs, so don't be caught short!


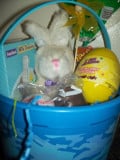
Easter Baskets for Your Pretty Eggs!
Even if you don't have a hunt, guests will still love these baskets as goodie bags. Kids will love customizing their own baskets too, so consider them as an entertaining addition to egg dyeing.
That's not the limit of it though. See the great video below for instructions on making a cute little paper Easter basket (unit conversion under the video). I would imagine that you could tweak the size to your liking by decreasing or increasing everything by the same proportion and just gluing together paper strips if you need them longer.
Adorable Paper Easter Basket - No Weaving!
I love this video! At first I thought it would be a woven paper basket, which would be cute, but when she started forming the basket I was shocked! Very simple craft. The video is a little long, so skip any parts that you think you have a handle on (no pun intended), just don't miss the juicy parts!
Centimeters to Inches Conversions
She is using centimeters, but maybe you don't, so here's the conversion. I used approximate measurements to make it more suited for inches.
Designer paper strips
10.25 inches long
1.25 inches wideBasket handle
11.5 inches long
1.5 inches wideBasket rim
10.25 inches long
2.5 inches wide
If I missed any other measurements, here is a centimeters to inches conversion site.
Photo Credits
Those people whose credits link to Flickr were kind enough to post wonderful photos under the Creative Commons 2.0 license, and are listed in the order in which their photo was used.
- Hollow Eggs
Courtesy stevendepolo - Recipe Photo 1
Courtesy _brendan - Recipe Photo 2
Courtesy john_lustig - Recipe Photo 3
Courtesy pineapple9995 - Dyeing Techniques Photo 1
Courtesy katietower - Dyeing Techniques Photo 2
Courtesy lizjones - Dyeing Techniques Photo 3
Courtesy cod_gabriel - Other Techniques Photo 1
Courtesy brian-m - Other Techniques Photo 2
Courtesy groundsel - Other Techniques Photo 3
Courtesy smoorenburg - Other Techniques Photo 4
Courtesy John Tann, photomanipulated to include origami paper photo, courtesy ninazed - Faux Eggs Photo 1
Courtesy stevendepolo - Faux Eggs Photo 2
Courtesy bluecottage - Faux Eggs Photo 3
Courtesy calliope - Faux Eggs Photo 4
Courtesy Courtney at Pizzazzerie - Easter Basket Photo
Courtesy butterflysha
If you have any of your own craft ideas, feel free to leave a comment, or general feedback. I hope you enjoyed this page, thanks for reading!